1. Check the fit before buying
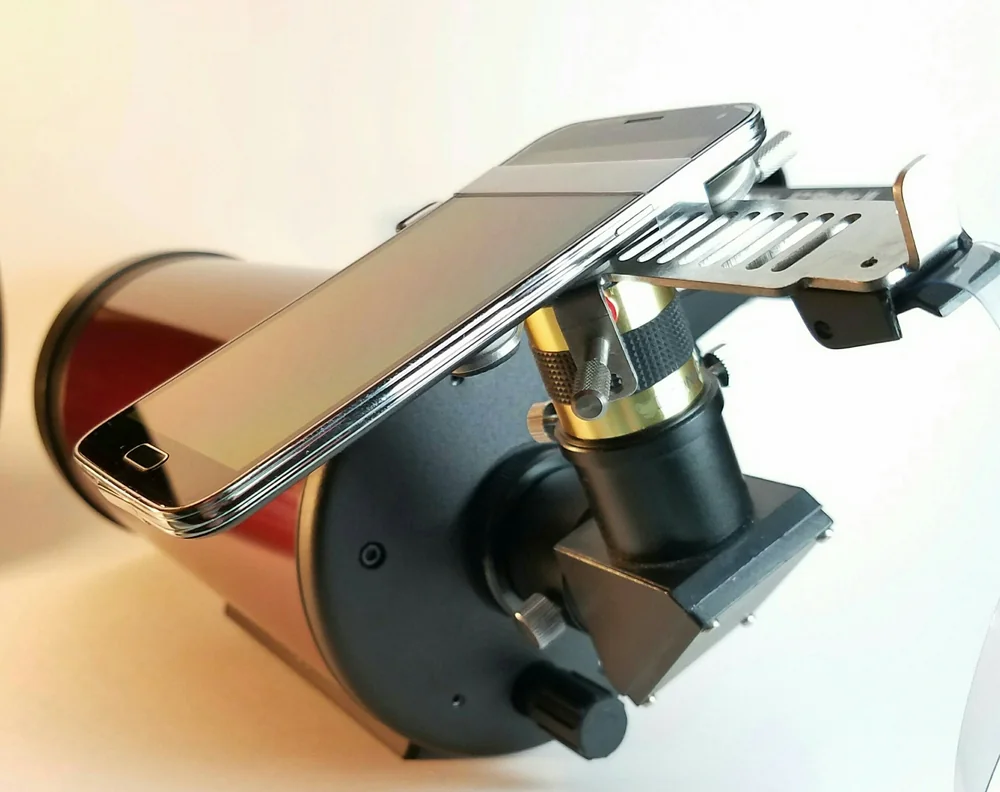
An adapter has to fit both ends: your phone and your scope’s eyepiece. “Universal” still comes with limits.
| Part | What to check |
|---|---|
| Phone and case | The holder must grip securely and let the camera reach the eyepiece. Check case thickness and the camera bump. |
| Eyepiece | Match the adapter’s stated diameter range or the exact ring/collar required for that eyepiece. |
| Adjustment | The holder needs enough movement to center the camera lens and set its distance from the eyepiece. |
A dedicated adapter case may be specific to one phone model; the eyepiece ring may also be separate. Check the complete combination before ordering. Follow the adapter manual if your everyday case needs removing. [DIGI-KOWA] [S4-O15]
2. Get the scope ready first
Put the scope on a secure tripod or suitable support. Pick a stationary, detailed target beyond your model’s minimum focus distance. If your scope has zoom, start low. Find the target and focus it by eye before attaching the phone. [S4-O01] [DIGI-KOWA]
If the view is already soft or shaking, work through the scope clarity checklist first. Never point the setup at the Sun. [S4-O16]
3. Line up the camera, not the phone
Fit the phone and adapter in the order the manufacturer specifies. Open the camera app, then center the active camera lens over the eyepiece while watching the preview.
Adjust up/down and side-to-side, then the lens-to-eyepiece distance if your adapter allows it. Aim for an evenly placed view rather than a bright sliver. Secure the fittings as instructed, without forcing them. [S4-O15]
If the preview suddenly shifts or goes dark, check whether the phone switched cameras. Some supported iPhones switch to an ultra-wide camera for macro work; the settings depend on the model. Keep the lens you are using aligned with the eyepiece. Locking focus does not necessarily stop the phone from switching cameras. [DIGI-MACRO]

4. Focus on the screen, then take a test shot
Tap a detailed part of the subject to focus. Fine-tune the scope while watching the screen: the camera may need a different setting from your eye. If focus keeps hunting, try focus lock where your camera app supports it. [S4-O15] [DIGI-KOWA]
Let the setup settle, then use a timer or compatible remote to avoid nudging it as you take the picture. Check the saved photo, not just the live preview. [DIGI-CAMERA] [DIGI-KOWA]
If you increase the scope’s magnification later, refocus and compare detail, not just size. Return to lower power if the result gets worse.
Black circle, dark crescent or blur?
These are useful starting checks, not proof that the scope or adapter is faulty.
| What you see | Try this |
|---|---|
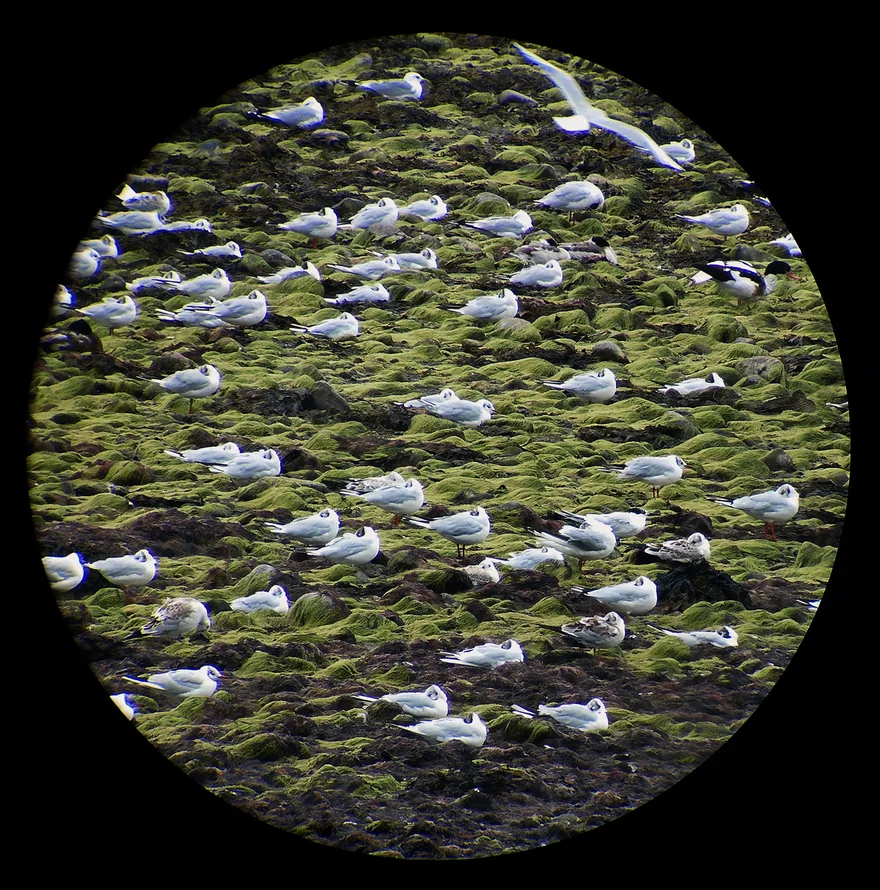
| A centered circle with a dark border | Recheck camera spacing. Some combinations leave a circular field even when aligned. |
| An off-center circle or one-sided shadow | Recenter the active camera and check its distance from the eyepiece. |
| The subject shakes when you touch the phone | Let it settle; try the timer or a remote. |
| A full view, but soft detail | Refocus for the camera; compare at lower power. |
The dark border is often called vignetting. It concerns how much of the image reaches the camera; it is different from a subject being out of focus. Cropping or digital enlargement can hide the border, but neither creates missing detail. [S4-O15] [DIGI-KOWA]

Still not getting a usable photo?
Recheck the phone, case, eyepiece and adapter as one combination. A clamp that attaches is not enough if it cannot put the camera in the right position. Ask the adapter maker about your exact setup before buying another part.
For the next checks, use phone-only blur and vibration. Still choosing the scope and support? Start with the spotting-scope guide.